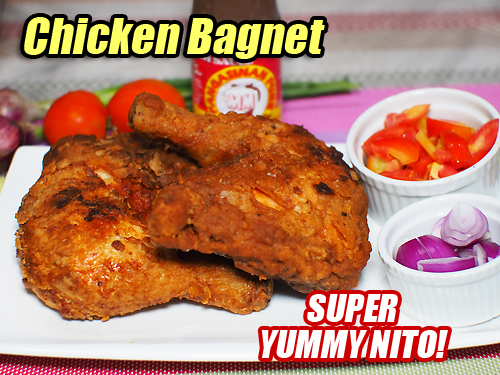
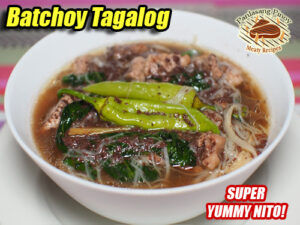
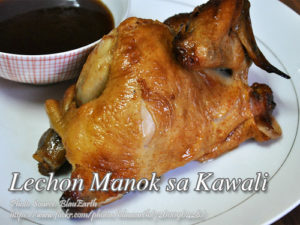
Chicken bagnet is the chicken counter part of the famous Ilokano dish called “bagnet” made from crispy fried pork belly slabs. This fried pork is very similar to the fried pork belly called “lechon kawali” popular in the Tagalog regions and I think the difference between the two is bagnet is more like a chicharon than a juicy fried pork belly compared to lechon kawali. Cooking the chicken bagnet is a little different in the pork version because it requires less cooking time and there is no need to boil it first before frying.
Unlock the Crispy Goodness
Discover the delightful world of this dish, a delectable twist on the traditional Ilokano dish that usually features crispy fried pork belly slabs. Similar to its porky counterpart, this chicken bagnet is a mouthwatering experience that combines the crunchiness of chicharon with the succulence of fried pork belly, reminiscent of the beloved Tagalog dish, lechon kawali. In this recipe blog, we’ll delve into the secrets of preparing this enticing dish, exploring the unique steps that set this bagnet apart.
Brining Magic: Preparing the Chicken Bagnet
Begin your cooking adventure by creating a brining solution that infuses the chicken with flavors. In a mixing bowl, blend water, bay leaves, black pepper, salt, and sugar until the salt and sugar dissolve, forming a flavorful concoction. Submerge the chicken in this brine solution and let it marinate overnight in the refrigerator. This step ensures that the chicken absorbs the savory essence, elevating its taste to new heights.
After the marination, allow the chicken to drain in a colander, letting excess liquid escape. This sets the stage for the next steps, as a briefly dried chicken surface enhances the adherence of the breading and batter.
Crafting the Perfect Coating: Breading and Batter
Prepare the breading by combining flour, cornstarch, white pepper, salt, garlic powder, and onion powder in a mixing bowl. This well-balanced blend of ingredients forms the crispy outer layer that encapsulates the succulent chicken. Ensure that the mixture is thoroughly combined, setting the foundation for the ultimate cooking experience.
Next, take half of the breading mixture and place it in an empty container. Gradually add water and mix until the consistency transforms into a batter. This versatile batter becomes the glue that adheres the breading to the chicken, creating a perfect harmony of textures with each bite.
Coat and Crisp: Bringing the Chicken to Life
Dredging the chicken is an art form in itself. Start by coating the chicken in the dry breading, creating the first layer of crispiness. Following this, dip the chicken into the batter, ensuring a thorough coating that locks in the flavors and juiciness. To intensify the crunch, dredge the chicken once more in the breading, ensuring every inch is covered.
Sizzle and Fry: Transforming Chicken to Chicken Bagnet
Heat your cooking oil in a pan or wok, ensuring it’s deep enough to submerge the chicken. The golden transformation begins as you carefully place the coated chicken into the hot oil. Fry each side for approximately 7 to 8 minutes until a glorious golden brown hue is achieved. This relatively shorter cooking time, compared to the pork version, is a distinctive feature of non-pork bagnet.
Once fried to perfection, transfer the chicken bagnet to a colander to drain excess oil, allowing it to retain its crispy exterior.
Serve with Flair: Elevating the Experience
To complete the experience, serve it with a side of chopped onions and tomatoes. Elevate the flavors with bagoong isda, a traditional Filipino fish sauce, serving as the perfect accompaniment and dipping sauce. This combination adds depth and complexity to the dish, enhancing the overall dining experience.
In conclusion, mastering the art of cooking bagnet involves a meticulous process of brining, breading, battering, and frying. Each step contributes to the symphony of flavors and textures that make this unique bagnet a culinary masterpiece. As you embark on this flavorful journey, savor the crispy goodness and relish the unique taste that sets chicken bagnet apart in the realm of Filipino cuisine.
Chicken Bagnet
Ingredients
- 1 kilo chicken leg quarter or whole chicken
For Brining
- 1 liter water
- 3 pcs bay leaves
- 1 tsp. ground or cracked black pepper
- 1 Tbsp. salt
- 1 Tbsp. sugar
For the Batter and Breading
- 1 and 1/2 cup cornstarch
- 1/2 cup all purpose flour
- 1 tsp. white pepper powder
- 1 tsp. fine salt
- 1 tsp. onion powder
- 1 tsp. garlic powder
Instructions
How to Cook Chicken Bagnet
- To make the brining solution: combine water, bay leaves, black pepper, salt and sugar in a mixing bowl. Stir until the salt and sugar is dissolved.
- Put the chicken in the brine solution and marinate the chicken overnight in a refrigerator.
- After brining, put the chicken in a colander to drain the liquid and let is stand for a few minutes to dry.
- In an empty mixing bowl, combine flour, cornstarch, white pepper, salt, garlic powder and onion powder. Mix until well combined.
- Divide the breading and put the other half on a empty container. Add water gradually and mix until the breading turns into a batter and the desired consistency is achieved.
- To coat the chicken: Dredge the chicken first in the breading, then dip in the batter and carefully coat the entire chicken.
- Dredge it again in the breading and coat it very well.
- Heat cooking oil in the pan or wok to deep enough to fry the chicken.
- Fry the chicken until golden brown about 7 to 8 minutes on each sides.
- When done, remove from the pan and place in a colander to drain excess oil.
- Serve with chopped onions and tomatoes with bagoong isda as side dish and dipping sauce.
Video
Notes
Cooking Tips of Chicken Bagnet:
- Optimal Brining: Ensure a flavorful outcome by allowing the chicken to marinate in the brine solution overnight, enhancing its taste and tenderness, while draining excess liquid before breading to achieve the desired crispy texture.
- Breading Mastery: Achieve a perfect crunch by thoroughly coating the chicken in a well-mixed blend of flour, cornstarch, white pepper, salt, garlic powder, and onion powder, then utilizing the batter to create a double-layered crispy exterior.
- Precision in Frying: Fry the chicken in sufficiently hot oil for 7 to 8 minutes on each side, ensuring a golden brown finish and a shorter cooking time compared to its pork counterpart, preserving the chicken's juicy tenderness.
Nutrition Notes:
Calorie and other nutrition information is derived from HappyFolks.Com recipe nutrition calculator. The percent daily value (%DV) is based on a daily 2,000 calorie diet.Nutrition Facts:
Amount per Serving:423g, Calories: 1042kcal, From fat:482, Total fat:53.4g, Saturated Fat:14.6g, Trans Fat:0.2g, Cholesterol:310mg, Sodium:1063mg Total Carbohydrate: 77g, Dietary Fiber: 2g, Sugars: 0g, Protein: 57g, Vitamin A: 6%, Vitamin C: 2%, Calcium: 4%, Iron: 21%
